10 Steps To Build Your First Website
HL News • April 19, 2014
If you’re a little behind the times and have finally decided to jump on the website bandwagon, this post is for you. First, let me say… Congratulations! Now is the perfect time to make that leap into the digital age and bring your brand to the web.

This blog post will cover 10 steps to get your website project up and running, whether you are doing it yourself, or hiring a website management team.
Step 1: Domain Name
Do you need a domain name? If your main purpose for setting up a website is to create a blog, you don’t necessarily need a domain name; there are many blog hosting companies like wordpress.com or blogger.com that will host your blog for you and include a domain name. The URL will usually look something like: yourblogname.blogspot.com, or yourblogname.wordpress.com.
If you want to host the site somewhere else, you will need a domain name. Be sure to pick something that represents your brand or products, if your company name is not available.
Companies like Network Solutions and GoDaddy.com will give you available variants if the name you want is already taken.
GoDaddy.com offers very competitive domain name registration pricing and it’s easy to redirect the name to another web host if you choose to host your site somewhere other than GoDaddy.com. You can also wait to register the name with the hosting company that you choose, but don’t wait too long or that perfect name you’ve found can be gone by the time you’re ready to buy it.
Step 2: Choose Your Platform (HTML, CMS, etc)
If you feel you are technologically savvy, and have a copy of an HTML editor like Dreamweaver, you may want to set up your own HTML website. Depending on your budget, you may think this is your only option; it’s not.
WordPress offers a self-hosted CMS (content management system) that is completely free and open source. WordPress features an easy 5-minute setup process, and with the thousands of themes offered for free in the WP repository (including responsive designs, not sure what responsive design is? Check out this post), you’re more than likely to find one that has the look and feel that you want for your site.
Other free CMS’s include: Joomla, Drupal, Cushy CMS, concrete5, Expression Engine (not fully featured, see paid options), Radiant, and DotNetNuke.
Paid (Commercial) options include sites like ExpressionEngine – Full Feature, Wix.com, Godaddy.com, SquareSpace.com, and CushyCMS which has a paid version that offers more features and branding support. All of these options come with hosting, and include it in their monthly pricing. Additionally, all offer support to help you build your site (generally for a support fee).
While these paid sites offer drag and drop type site creation – many boast easy-to-use set up for novice and first time website builders – you may find yourself limited in the full customization of your site, and the fees for full customization can run quite high.
Step 3: Hosting
If you aren’t using a hosted platform, deciding where you will host your website is your next step in creating your online presence.
Once you’ve picked your platform, you will know whether you need Windows or Linux.
Windows platforms do best running sites with ASP and Linux servers are great for PHP. Be sure to check with the hosting company as the prices for Windows servers are generally more expensive than Linux servers. If you have decided on using WordPress as your platform, be sure to ask the sales rep at the hosting company you choose if they support WP. Not all hosting companies are created equal when it comes to WordPress.
Some great hosting companies are: Rackspace, GoDaddy.com, NetworkSolutions, MediaTemple and BlueHost.
Step 4: Logo/Branding
Do you already have a logo and brand identity? If so, that’s great. You’ll want to incorporate that into your website design. Consistency is key when it comes to creating a website. Think of branding as 360 degree marketing; your website design, business cards, and brochures should all have the same color scheme, logo and overall look.
If you have some ideas of what you want, or maybe just know what colors you want, there are several logo design companies that will create a logo for you, based on your input.
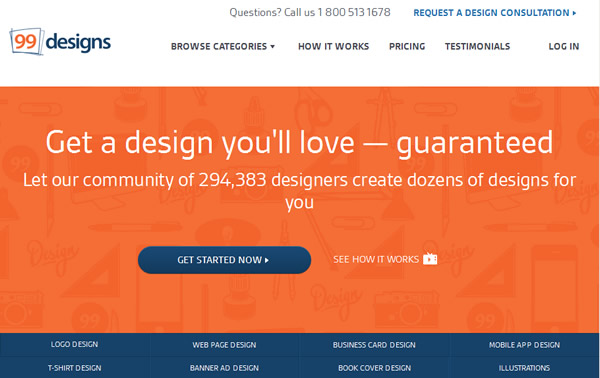
Check out 99designs.com, DesignCrowd.com, and CrowdSpring.com. These companies have designers who submit their designs for your project, and let you pick the winner. It’s nice because you get a lot of different looks to choose from.
If you want something free (or relatively inexpensive) with some fancy text and clip art, check out: LogoMaker.com, VistaPrint.com, LogoGarden.com, LogoTypeMaker.com, GraphicSprings.com, and LogoYes.com.
Step 5: Plan out Your Site – Pages & Content
The next step in building your first website is planning your website layout and pages (or sections for a one-page site) that will be inside your website.
Typically, pages and/or sections include: Home, About, Services, Contact and Blog.
Think about what a user would like to know about your business, or other information that you would like to highlight. Perhaps you have videos that you want to showcase; you would want to create a Video or Podcast page. Or, if you have a lot of services, think about creating individual pages for each of those services.
Other page ideas include: Testimonials, Frequently Asked Questions (FAQ), Privacy Policy, Newsroom, Portfolio, Pricing, Special Offers, and Site Map.
Step 6: Determining the site design
After you’ve planned out your pages & content, the next step is to consider the overall site design. You should consider how to arrange your content so that the most important points are easy to find a stand-out.
Remember that your website is a brochure that any potential customer, anywhere and at any time, will view and decide whether your company is the right one for them. Key points to consider are:
1. Your Purpose
Ask yourself, “Why am I building this website?”. Your purpose can be as simple as “create brand awareness” or more complex like “act as a lead generation tool and increase sales of our products”. Before you start building your website, you should have a firm understanding of the goals for your organization as they relate to your website.
2. Your Audience
Know who you are talking to. More importantly, ask “who do I WANT to talk to?” Your design should speak to the demographics (age, interest group, culture, etc.) that you are targeting. If your audience is broad, consider micro-sites geared toward each group.
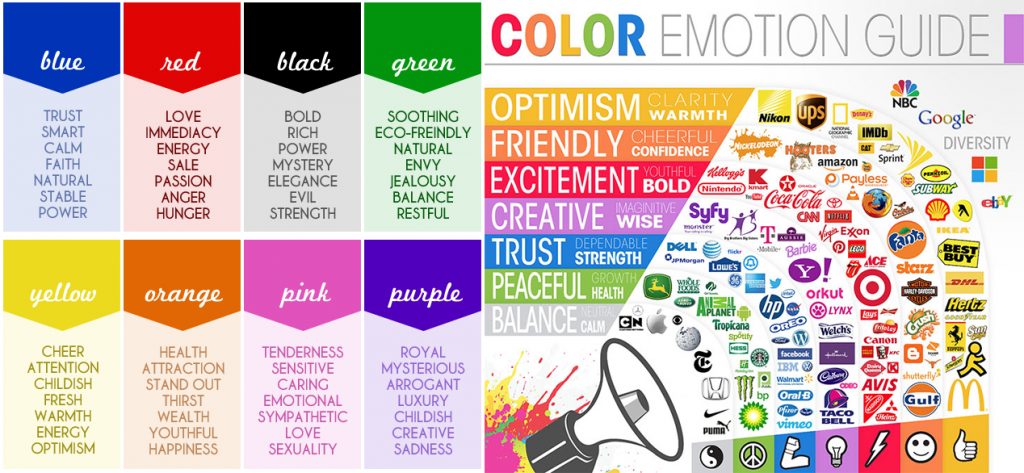
Color also plays a part in how users will feel when they visit your site. Check out the color-emotion graphic below:
3. Site Navigation
How easily your site can be navigated, by both human visitors and search engines, will have a significant effect on the visibility and success of your new website. Ask yourself, “how will users navigate the site in order to produce a desired action?”, then ask “Can I do anything to shorten their trip and increase conversions?”. citation
Remember, if a visitor experiences any confusion in any way they WILL leave and more than likely, they won’t return.
4. Your competition
Research what your competitors are doing and make your message different. The key here is to find out what they are doing successfully and expand upon it, creating even more success for your version and making your brand stand out.
5. Your Content and Call To Action
Be sure to focus on your call-to-action, your loud and proud message, that you want users to not overlook. The idea is to turn visitors into leads, and leads into customers. Ideally, your call-to-action should be on every page. Think about one function and drive your site visitors to do it, like a contact form or request for information form. Each time a user completes your call-to-action, you complete a lead conversion. Follow up with that lead in person, and turn it into a customer.
Step 7: Setting up a development area
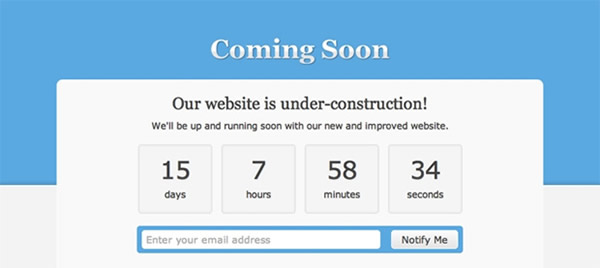
This can be as simple as placing a file on your server called index.html (or index.php, or index.asp) that has some ‘coming soon’ text on it. Check with your web host to see which extension loads first, ie. .html, .php or .asp.
The index.html page (or .asp, .php, etc.) is generally the first file that is served when someone visits your website. It’s not always shown in the URL but it is the page that the server knows to show (*unless your hosting providers has their servers configured differently, check with them for verification). An example of this is www.heartlandwebgroup.com vs. www.heartlandwebgroup.com/index.php – both addresses will produce the same exact page, the server just removes the index.php part from the URL.
Once you have your coming soon page up, you can load all of your other site files (be sure to name your home page something like home.html as not to conflict with index.html) and begin your development.
If you decide to use WordPress or a similar CMS, there are plugins available that create a maintenance screen for non-logged in users, so you can develop your site on the live server and not unveil it until you are ready.
Step 8: Testing
Once you’ve built your site, you should test it on different browsers and make sure that everything looks the same, regardless of the browser that you use to view it. It’s widely known that a site viewed on Internet Explorer will many times look different than when its viewed on Firefox (especially if you have a responsive design).
Testing one user early in the project is better than testing 50 near the end. ~ Steve Krug
The top browsers to check are: Internet Explorer, Firefox, Chrome, Opera and Safari, but there are many, many more you can test.
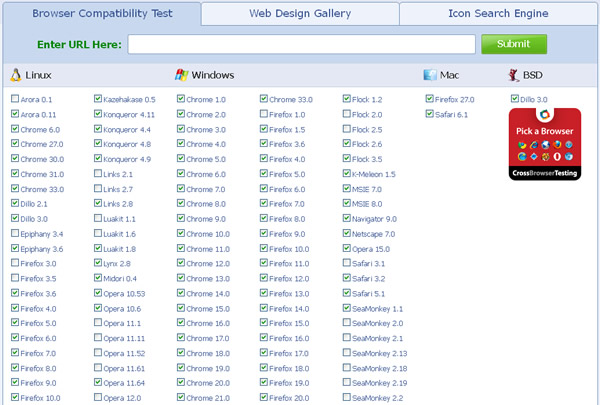
There are some online tools for automating this process like Browser Shots and AnyBrowser.com (for all web browsers) and NetRenderer (specifically for different versions of IE).
To see how your responsive site looks, check out Screenfly by Quirktools. It’s a free website that shows you how your site looks on tablets, PC’s, TV’s and cell phones.
Other free responsive testing sites include: Responsinator.com, StudioPress.com/responsive, and ResponsiveTest.com.
Step 9: Site Launch
Once you’ve tested your site and fixed any glaring issues, it’s time to launch your site. If you’ve developed your site in a test environment, move your files over to your live server and then test one last time to make sure everything transferred correctly.
If you put up a ‘coming soon’ index.html page (see step 6 if this part is confusing), delete it from the server and rename your home.html file to index.html so that it comes up first.
If you used a maintenance screen plugin on your CMS, change the status to off, or just deactivate the plugin. Test the site in a different browser as a non-logged in user to make sure that the maintenance plugin is truly deactivated.
Step 10: Marketing
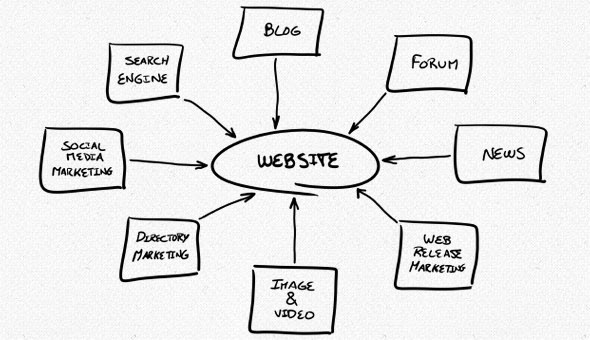
Now that your site is live, it’s time to think about how you are going to market it. How are users going to find it? Besides including your new web address (URL) on all of your business cards, brochures, vehicle wrapping, radio and TV ads, you should also consider some type of online advertising.
Search Engine Optimization(SEO) is a common practice used to get your site ranking at the top of the most common search engines like Google, Yahoo and Bing. This method brings traffic to your site organically, meaning you don’t pay for the traffic. Organic SEO takes longer to produce results, but when done correctly, is great for long-term results.
Organic SEO is also something you can start by doing yourself by including a Title tag, Meta description and author tags, formatting the HTML with H1, H2 tags and submitting your site to all of the major search engines.
Over time Google, Yahoo and Bing will begin to rank your website. From there you can increase your efforts through tools like Google Webmaster Tools and Google Developer Tools (which allows you to find ways to increase your page load speed). Both of these tools give you suggestions on how to improve your website.
Search Engine Marketing(SEM) is another common practice used to bring traffic to your site and includes PPC (pay per click) marketing and other types of paid traffic. Google, Yahoo and Bing all offer different PPC campaigns that you can create and get your ads showing up in as little as 24 hours.
PPC marketing does exactly what it says; you pay the search engine each time that someone clicks on your ad. Depending on how competitive your keywords are, and the location that you are targeting, this method can get expense, fast. If you are not well-versed in PPC marketing, it’s a great idea to hire a Google Certified AdWords (or similar) company to manage your PPC campaign. While you will be spending extra money each month for the management of the campaign, the SEM expert will almost certainly save you money on your campaigns through negative keywords, keyword ad-groups, and other strategic PPC optimization methods.
No matter what marketing tools you employ, be sure to check their effectiveness using Google Analytics or a similar site statistics monitoring program. With Google Analytics, you can glean valuable information on your site visitors, overall traffic, bounce-rate and conversions.
Conclusion
Building your own website certainly isn’t for everyone. And, there is definitely something to be said for hiring a company whose main focus is developing websites.
I always tell my clients, ‘Do what you do best, let me do what I do best’.
Your main focus should always be on your business. It’s tempting to want to save some money and have a friend, cousin, brother-in-law, etc. who took a class in web design 101 build your site, but you’ll generally get a more professional look, and overall better product, by hiring an experienced company to build it for you.
This isn’t to say you should be completely hands-off when it comes to your website. If your website includes a blog, use it and keep the public informed about the current events of your company, show expertise in your field, or just post monthly specials; Google, Yahoo and Bing LOVE fresh content. So stay involved, create a blog and just get started.
Questions about any of the information contained in this post?
Contact us for help with any aspect of creating your new website.

